nest.js에 MySQL 연결하기
이 포스트에서는 nest.js에 database 연결 튜토리얼을 소개하려 합니다. nest.js에
대한 설명은 Hello nest.js 포스트 참고를 추천드리고, 이
글에서는 typeorm을 이용하여 MySQL에 접속하여 간단하게 데이터를 가져오는 테스트를 진행하려 합니다.
먼저 빠른 설정을 위해 nest/cli를 통해 생성한 boilerplate 프로젝트 위에서 진행하도록 하겠습니다.
$ npm install -g @nestjs/cli
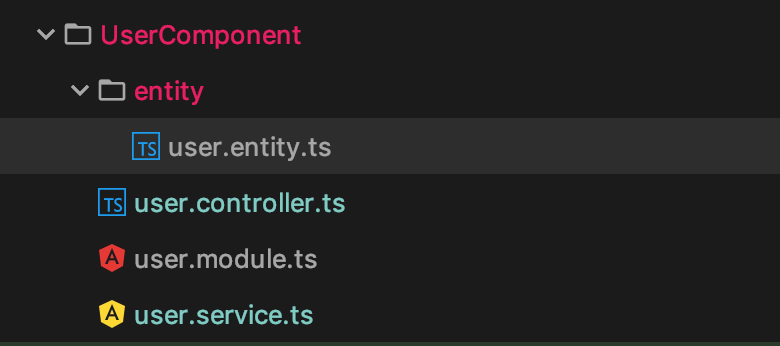
$ nest new project-name생성된 보일러플레이트의 구조는 아래와 같습니다.

간단한 User 정보를 가져오기 위해 아래와 같이 구성하였습니다.
먼저 MySQL에 연결하기 위해 사용한 typeorm 라이브러리를 설치합니다.
$ npm install --save-dev @nestjs/typeorm typeorm먼저 CRUD에 사용할 entity를 살펴보겠습니다.
# user.entity.js
import { Entity, Column, PrimaryGeneratedColumn, Index } from 'typeorm';
@Entity()
@Index(['userId', 'email'])
export class User {
@PrimaryGeneratedColumn()
userSeq: number;
@Column({ length: 40, unique: true })
userId: string;
@Column({ length: 256, nullable: false })
password: string;
@Column({ length: 40 })
name: string;
@Column({ length: 12 })
phone: string;
@Column({ length: 40, unique: true })
email: string;
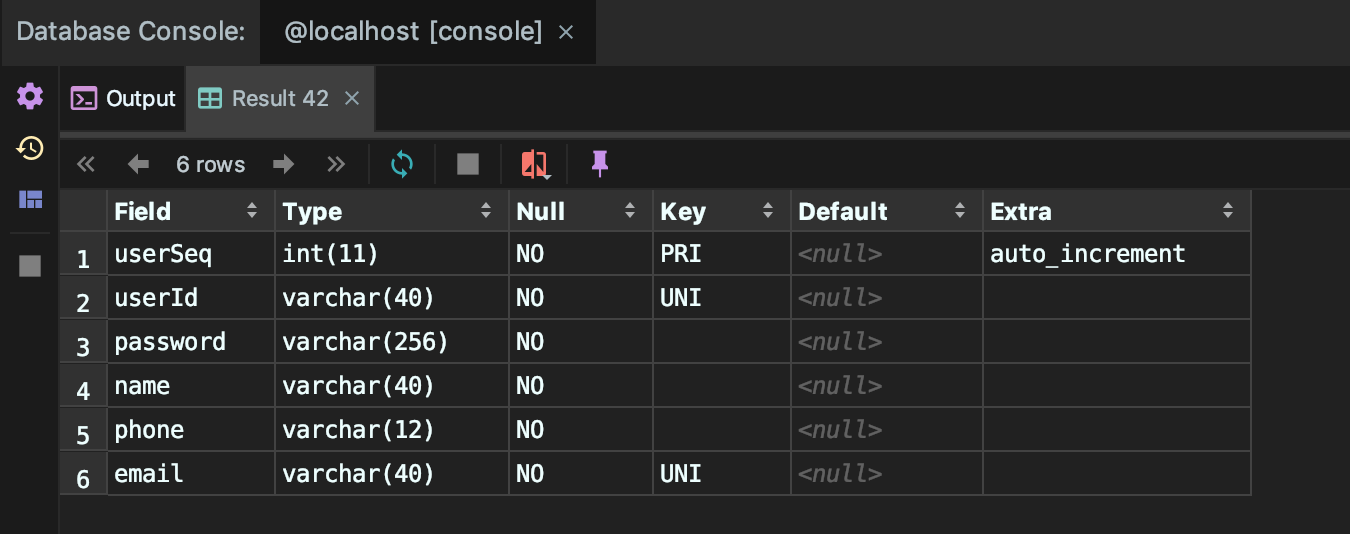
}위 작성 내용을 보면 어노테이션을 통해 여러 설정을 하는 부분을 확인할 수 있는데요, 각 어노테이션 별 기능에 대해서는 typeorm에서 확인하실 수 있으며, 위와 같이 설정 후 DB에 연결 시 위 Entity에 맞게 자동으로 테이블을 만들어 줍니다.
위 Entity로 생성된 테이블은 아래와 같습니다.
그리고 비즈니스 로직이 담길 서비스 쪽 코드를 확인해 보겠습니다.
# user.service.ts
import { Injectable} from '@nestjs/common';
import { InjectRepository } from '@nestjs/typeorm';
import { Repository } from 'typeorm';

import { User } from './entity/user.entity';

@Injectable()
export class UserService {
  constructor(
    @InjectRepository(User)
    private readonly userRepository: Repository<User>
  ) {}

  async getAllUsers(): Promise<User[]> {
    return await this.userRepository.find();
  }
}
위 service 코드를 보면 Entity로 생성한 User를 Repository로 주입하는 부분을 확인할 수 있습니다. 이과 같이 여러 Entity에 대해서 동일한 방법으로 사용하시면 여러 Entity를 사용하실 수 있습니다. 그리고
실제 모든 유저의 데이터를 가지고 오는 getAllUsers 함수에서는 기본적으로 repository에서 제공하는 함수들을 통하여 CRUD를 진행하실 수 있습니다.
다음으로 유저의 접근을 직접 받는 controller를 살펴보겠습니다.
# user.controller.ts
import { Controller, Get } from '@nestjs/common';
import { UserService } from './user.service';
import { User } from './entity/user.entity';

@Controller('/user')
export class UserController {
  constructor(private readonly userService: UserService) {}

  @Get('/list')
  getAllUsers(): Promise<User[]> {
    return this.userService.getAllUsers();
  }
}
위 컨트롤러에선 앞서 구현한 UserService를 주입받아 사용하고 있으며 리턴 값으로 User(Entity) 리스트를 반환하는 프로미스를 반환하고 있습니다.
여기까지 설정을 하게 되면 유저로부터의 요청을 받은 후부터 어느 서비스의 함수를 호출하여 어느 Entity로 데이터를 가지고 오는지 까지 구현이 끝났습니다. 이제 이 구현 부분들을 사용하는 모듈을 작성하도록 하겠습니다.
# user.module.ts
import { Module } from '@nestjs/common';
import { TypeOrmModule } from '@nestjs/typeorm';

import { UserController } from './user.controller';
import { UserService } from './user.service';
import { User } from './entity/user.entity';

@Module({
  imports: [TypeOrmModule.forFeature([User])],
  controllers: [UserController],
  providers: [UserService],
})
export class UserModule {}
위 작성된 UserModule을 보면 앞서 작성한 컨트롤러, 서비스, 엔티티를 사용하도록 작성하였으며 특히 imports부분을 보면 TypeOrmModule에서
forFeature (해당 모듈 스코프 제한)을 이용하여 데이터베이스 커넥션을 맺으며 사용할 엔티티를 리스트로 받도록 되어 있습니다.
마지막으로 지금까지 작성한 UserModule을 RootModule인 AppModule에 추가하도록 하겠습니다.
# app.module.ts
import { Module } from '@nestjs/common';
import { TypeOrmModule } from '@nestjs/typeorm';
import { Connection } from 'typeorm';

import { AppController } from './app.controller';
import { AppService } from './app.service';
import { UserModule } from './UserComponent/user.module';

@Module({
  imports: [
    TypeOrmModule.forRoot({
      type: 'mysql',
      host: 'localhost',
      port: 32771,
      username: 'banzi',
      password: '12341234',
      database: 'banzi',
      entities: [__dirname + '/**/*.entity{.ts,.js}'],
      synchronize: true,
    }),
    UserModule,
  ],
  controllers: [AppController],
  providers: [AppService],
})
export class AppModule {
  constructor(private readonly connection: Connection) {}
}
여기서 imports를 확인해보면 앞서 UserModule에서 작성한 부분과 비슷해 보이지만 여기서는 forRoot를 사용하고 있습니다. 이는 typeorm의 createConnection와 같은 파라미터를 제공받으며 App 전체에서 접근 가능한 Context의 connection을 주입받습니다. 여기서
작성한 DB 접근 정보를 파라미터로 주지 않는다면 프로젝트 루트 경로의 ormconfig.json의 파일에서 설정 값을 자동으로 찾아 사용합니다.
여기까지 작성을 모두 마치셨다면 서버를 띄워 보도록 하겠습니다.
➜  banzi (master) ✗ npm run start

> banzi-temp@0.0.1 start /Users/sunhyun/IdeaProjects/banzi
> ts-node -r tsconfig-paths/register src/server/main.ts

[Nest] 68053   - 04/10/2019, 4:11 PM   [NestFactory] Starting Nest application...
[Nest] 68053   - 04/10/2019, 4:11 PM   [InstanceLoader] TypeOrmModule dependencies initialized +102ms
[Nest] 68053   - 04/10/2019, 4:11 PM   [InstanceLoader] TypeOrmCoreModule dependencies initialized +184ms
[Nest] 68053   - 04/10/2019, 4:11 PM   [InstanceLoader] TypeOrmModule dependencies initialized +0ms
[Nest] 68053   - 04/10/2019, 4:11 PM   [InstanceLoader] AppModule dependencies initialized +1ms
[Nest] 68053   - 04/10/2019, 4:11 PM   [InstanceLoader] UserModule dependencies initialized +1ms
[Nest] 68053   - 04/10/2019, 4:11 PM   [RoutesResolver] AppController {/}: +6ms
[Nest] 68053   - 04/10/2019, 4:11 PM   [RouterExplorer] Mapped {/, GET} route +2ms
[Nest] 68053   - 04/10/2019, 4:11 PM   [RoutesResolver] UserController {/user}: +1ms
[Nest] 68053   - 04/10/2019, 4:11 PM   [RouterExplorer] Mapped {/list, GET} route +2ms
[Nest] 68053   - 04/10/2019, 4:11 PM   [NestApplication] Nest application successfully started +2ms
서버를 띄우게 되면 컨트롤러에서 작성한 API 경로들이 맵핑되는 부분들을 확인하실 수 있습니다. 그리고
서버가 정상적으로 실행되었다면
➜  test-project (master) ✗ curl http://localhost:3000/user/list
[{"userSeq":1,"userId":"UserID","password":"pw1234","name":"옥동자","phone":"01012341234","email":"abc@gmail.com"}]
이처럼 데이터가 정상적으로 내려오는 것을 확인하실 수 있습니다.
감사합니다.